

how to upload images to cricut design space app
How to Upload Images to Cricut Design Space. Step by step tutorial on how to upload images, SVGs, and patterns plus a video tutorial.
Welcome to Lesson 5 on Cricut Design Space Basics. Today, we are talking about how to upload images in Cricut Design Space. The ability to add your own images to Design Space allows for infinite possibilities for the types of projects you can create. Whether you are creating your own images or purchasing them, you have a lot more options for truly customizing your projects beyond what is available in the Design Space app.

This post contains affiliate links. If you purchase something through the link, I may receive a small commission at no extra charge to you. Please read my full disclosure policy here.
What Types of Images Can I Upload to Cricut Design Space?
You can upload two types of your own images – basic images or vector images. Basic images are those you are probably most familiar with – .jpg, .bmp, .png, and .gif. These will be downloaded as a single layer. Vector images are .svg and .dxf files. These types of images will be automatically separated into layers after uploading and saving.
Note: You cannot upload a .pdf. Many free printables online are PDF files, so be sure you check your file type before trying to upload an image.
How to Upload Images in Cricut Design Space
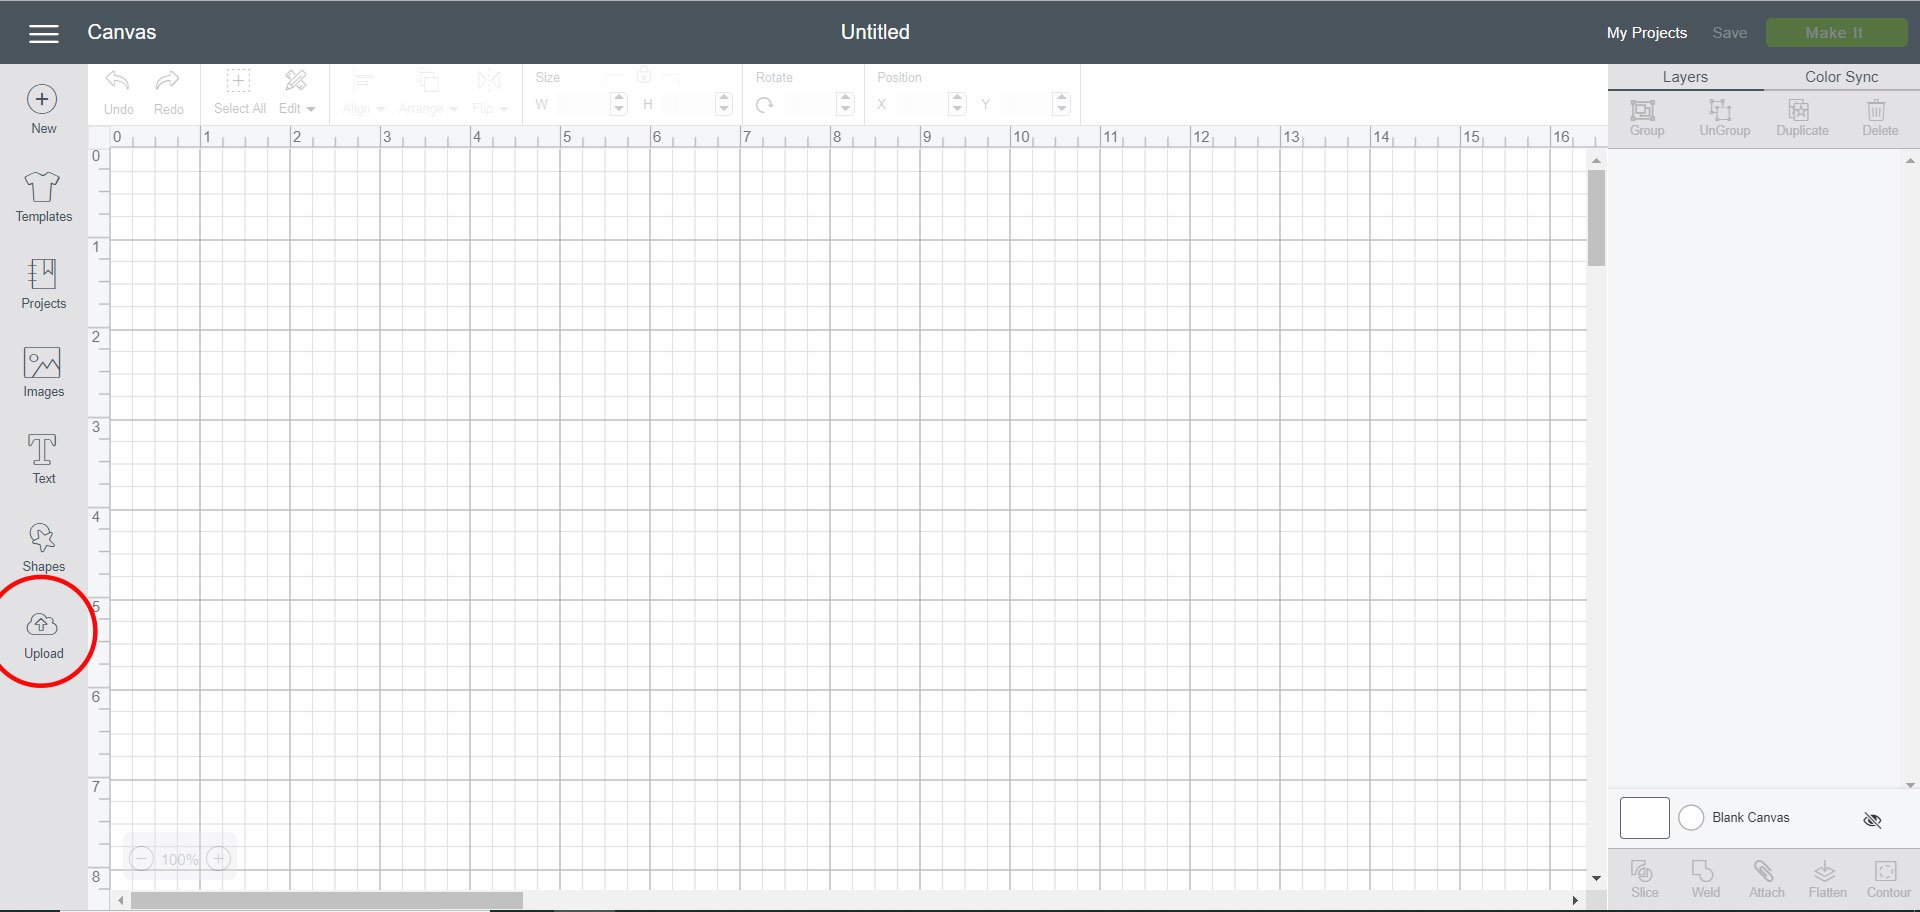
Open Cricut Design Space, selectNew Projectand click on theUpload tool in the design panel.
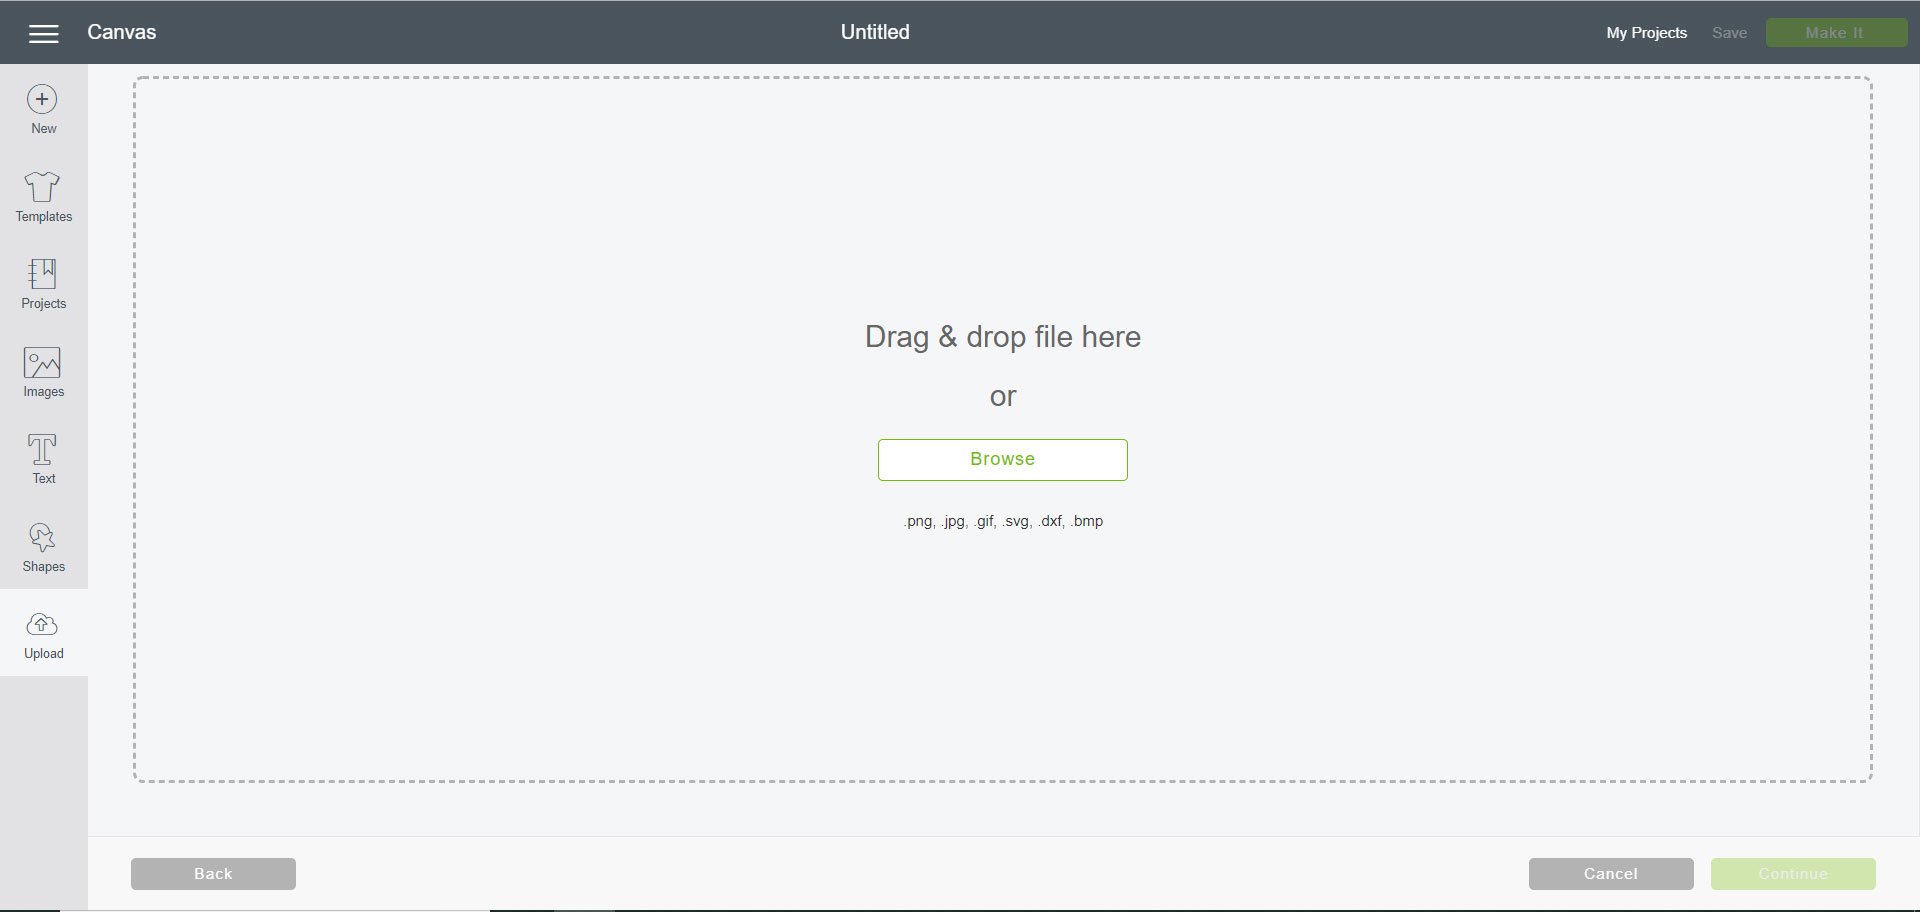
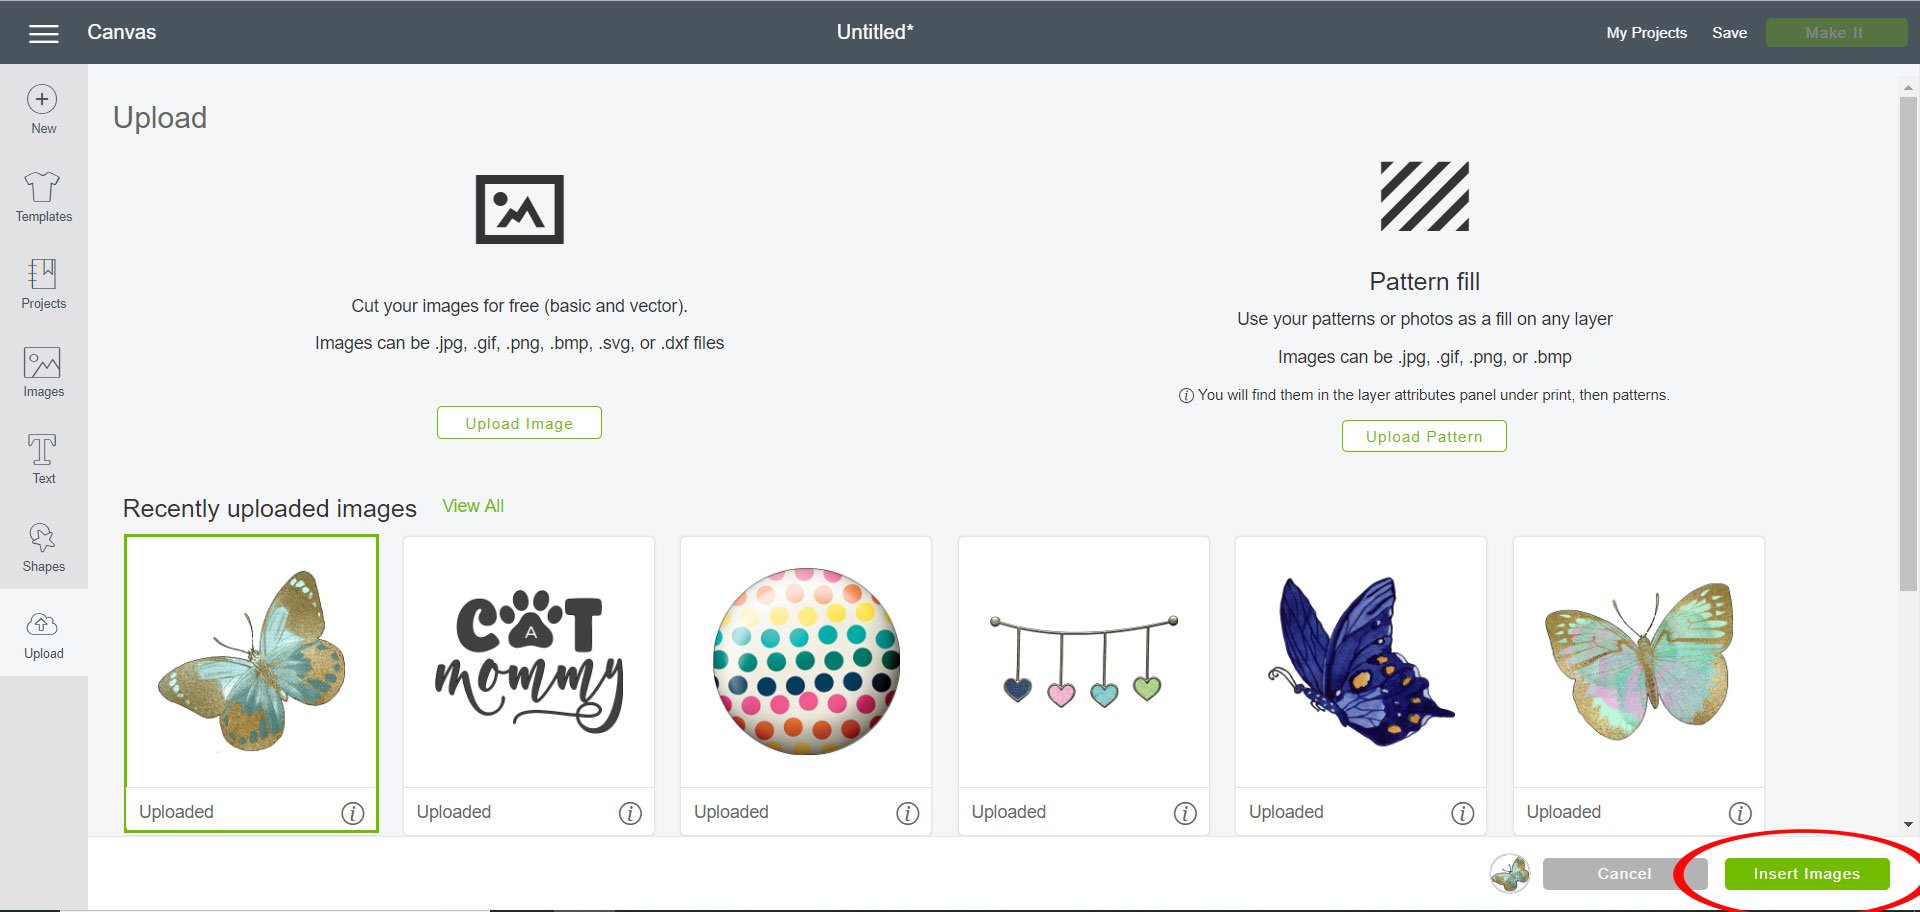
This will open the upload screen. From here, you can choose to upload either an image or a pattern. Click the Upload Image button.

From here, you can either drag and drop your image or click theBrowse button to find the file you want on your computer. Choose your file and clickOpen.
Design Bundles: Butterfly Image
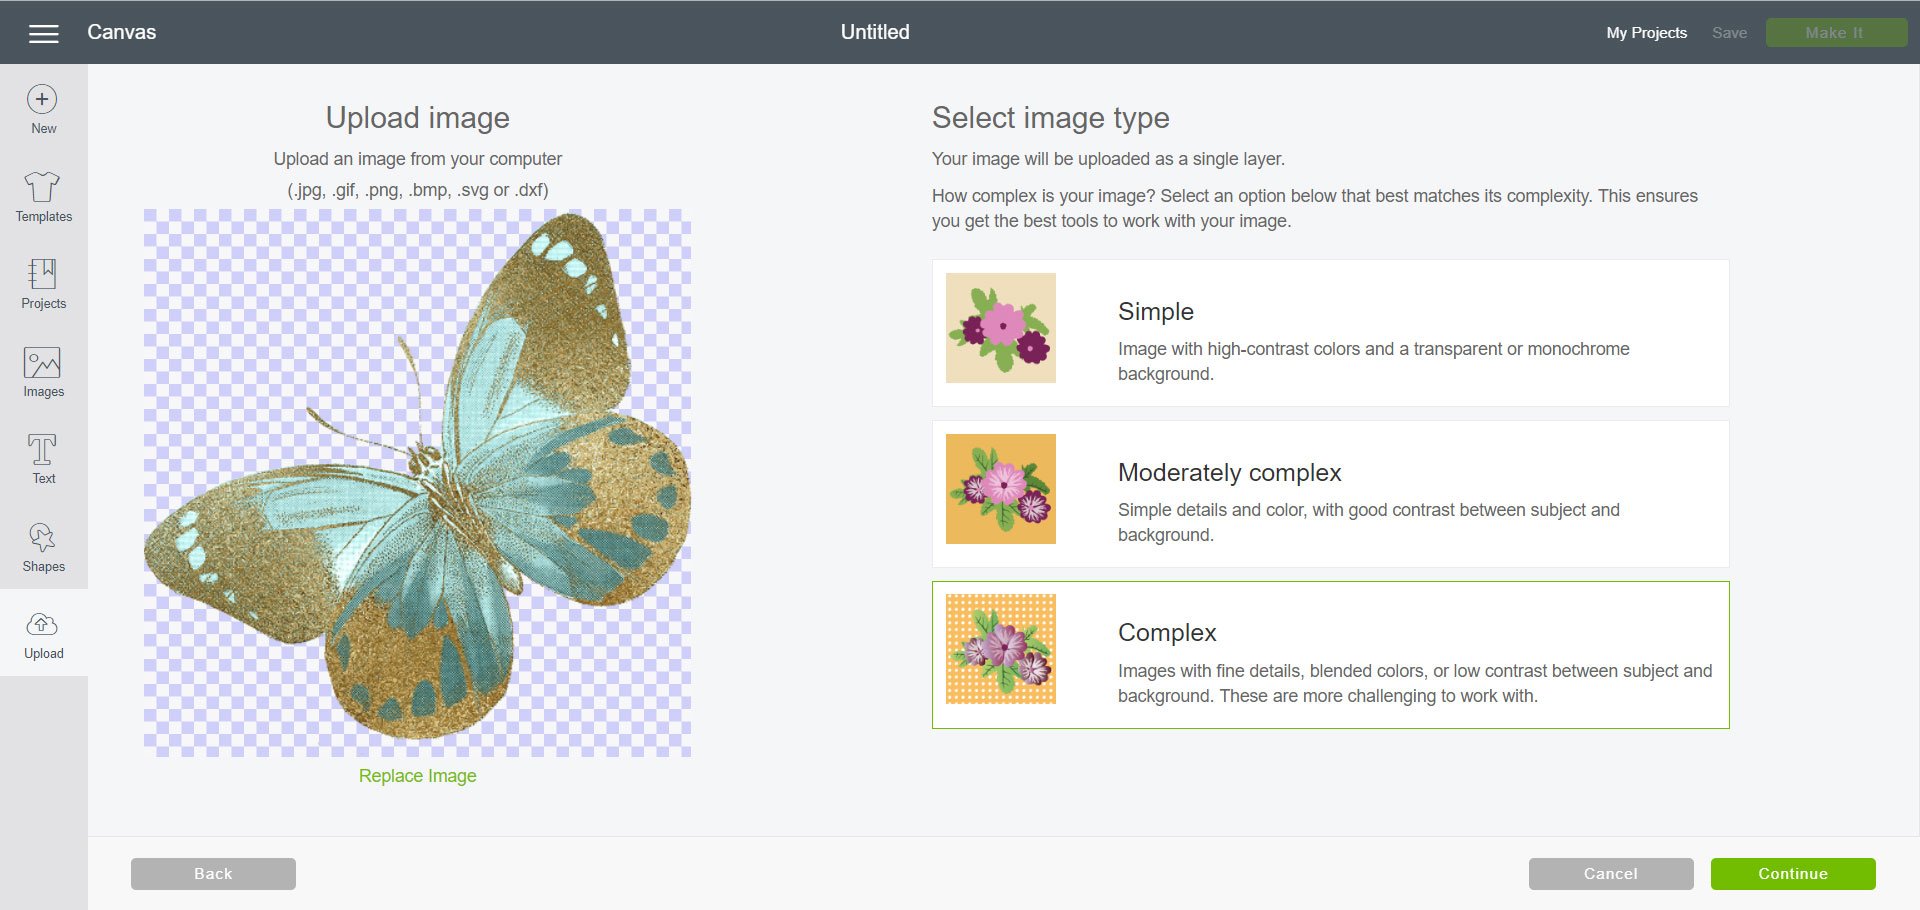
Since the image I chose is a .png file, it will be uploaded as a single image. You can choose how simple or complex your image is. If it is a simple font that is all one color the Simple background often works well. In an image like the butterfly I chose, Complex will be the best choice. Click Continue.
Helpful Tip: If you have the choice between a .jpg or .png, choose the .png because it will already have a transparent background. If your only option is a .jpg you can still use the image, but you may have to delete the background on the next screen.
In this next step, you can remove any unwanted background from your image. You can choose Select & Erase, Erase, and Crop in the upper left corner to adjust your image exactly how you want it.

- Select & Erase: Allows you to click on an area of the image and erase it
- Erase:Use just like a real eraser, and choose exactly what part of the design to erase, rather than clicking on an entire section
- Crop:Crop your image to the desired width and height
To show how the image will cut, click Preview. If there are still unwanted areas, you can go back and edit your image further. Once you have edited your image click Continue.
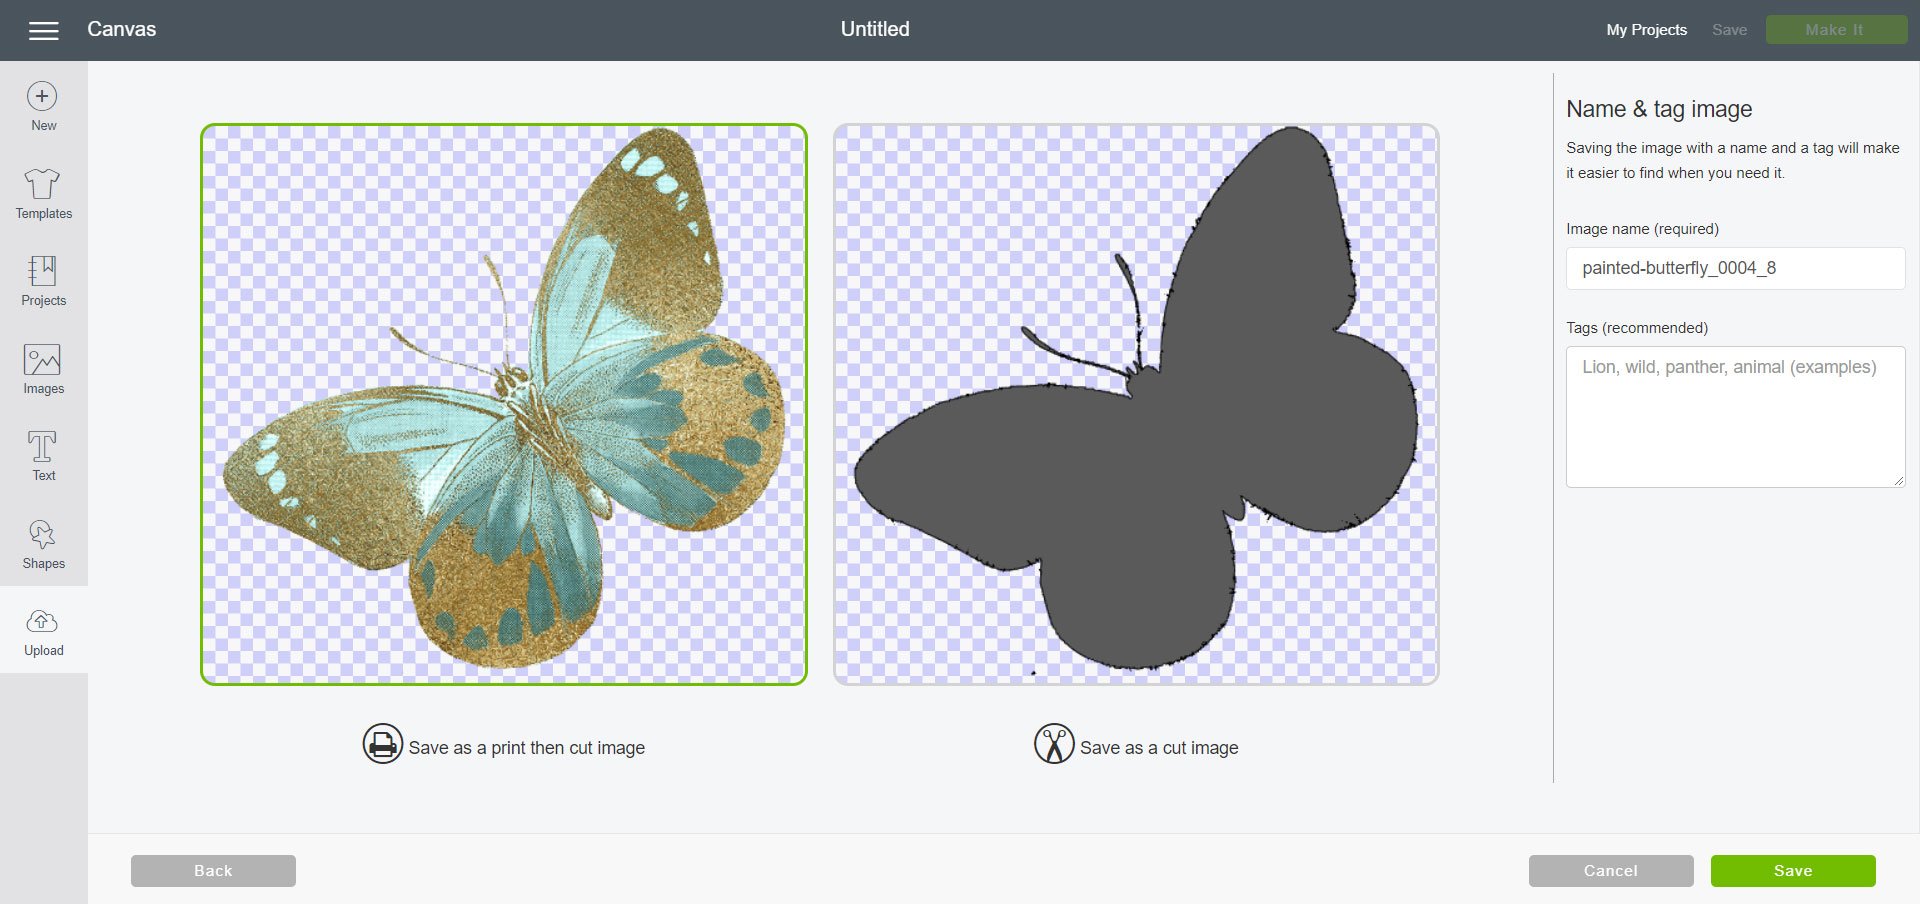
You can now choose to save your image as a Print then Cut or a Cut Image. Print then Cut saves it exactly how you uploaded it with all the details and colors. Saving it as a cut image will save it as an outline to be cut out on your project. You can also change the image name and tag your image as needed. When you are finished click Save.
Your image will be saved to the Uploaded Images Library. To use it in a project, select the image and then click Insert Images.

How to Upload SVG Files to Cricut Design Space
Many of the images available in Cricut Design Space work like a .svg file. When you add an image from the Design Space library to your project the multiple layers are there for you to show, hide, and change the color of. A .svg or .dxf file works in much the same way. When you upload your own .svg to Cricut Design Space the layers will be available for you to manipulate.
Navigate to the upload image screen again. Click Upload Image.
Drag and drop your image or click theBrowse button to find the file you want on your computer. Choose your file and clickOpen.
Design Bundles: SVG Bundle
Name and tag your image and click Save.

Your image will be saved to the Uploaded Images Library. To use it in a project, select the image and then click Insert Images.
You can see when I added this image to my canvas, there is a separate layer for each design piece.

I can choose to make them each a different color for vinyl or iron-on projects.

I can also select certain parts of the image to not show in my final design by selecting the eye next to that particular layer.

How to Upload a Pattern to Cricut Design Space
Once again navigate to the upload screen. Instead of clicking Upload Images, select Upload Pattern.

You can drag and drop or Browse your computer for the pattern you want to use. Select the pattern and click Open.
The Hungry Jpeg: Butterfly Pattern
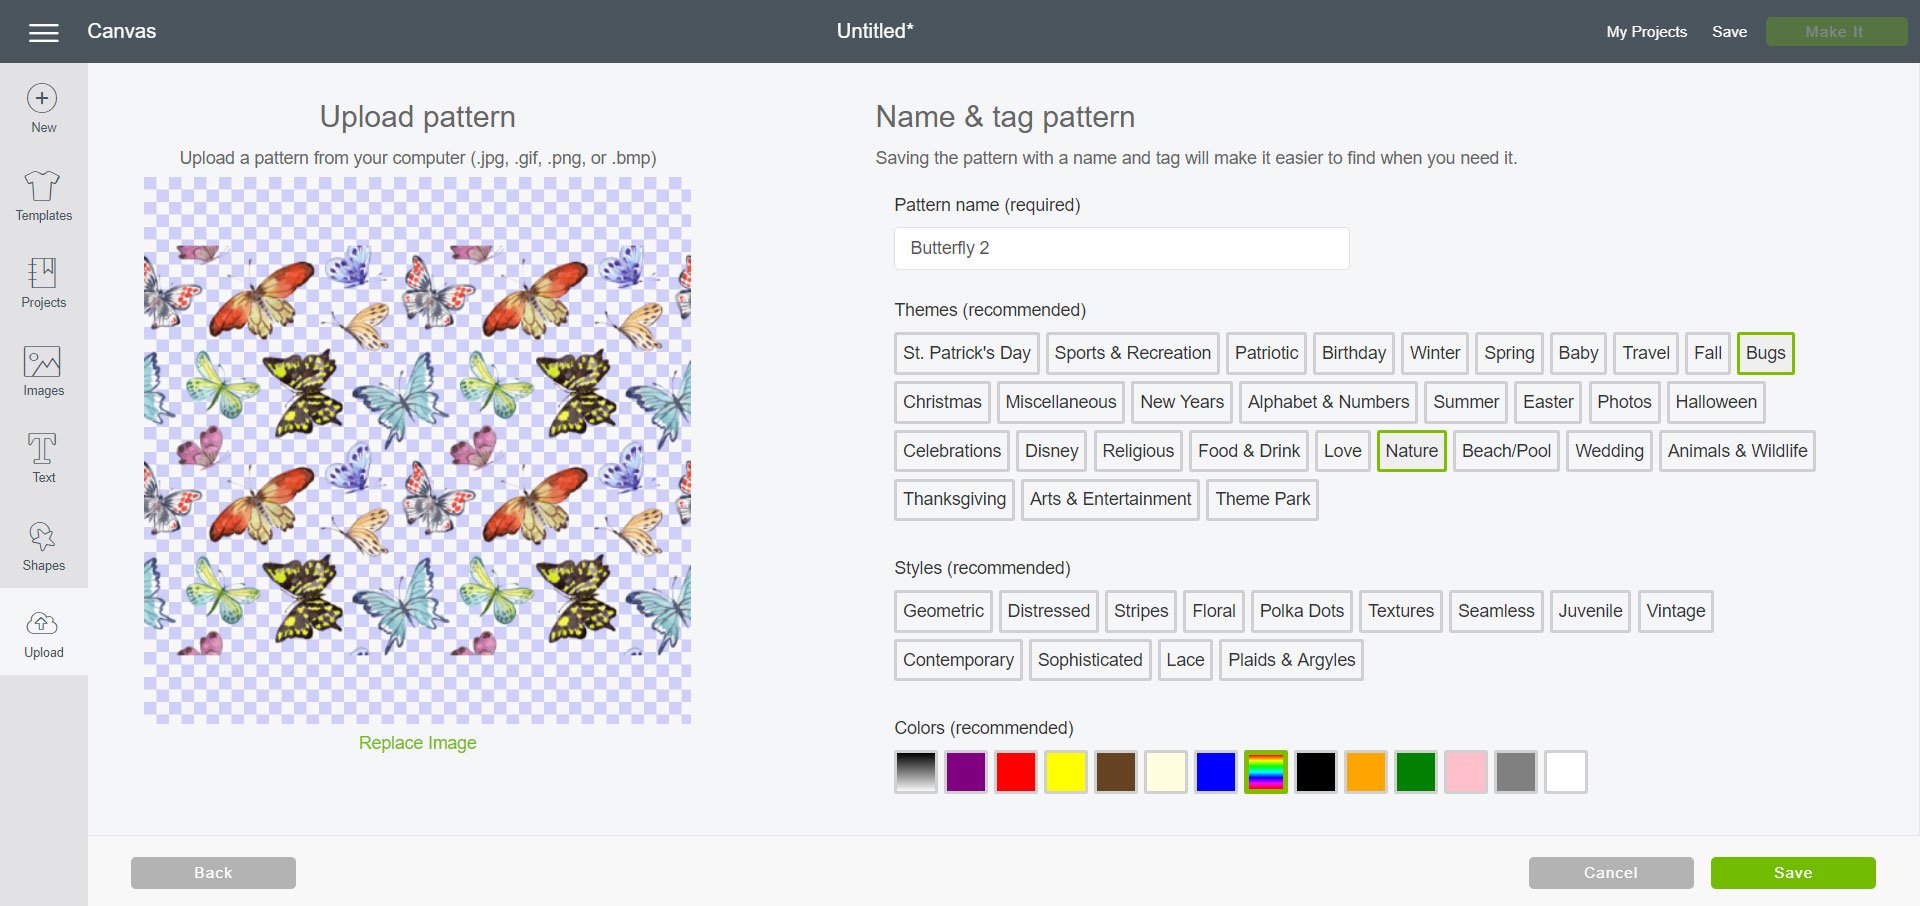
You can name your pattern, choose a theme, style, and color(s). It is recommended to select each of these so it is easier to find your pattern when creating a project. When you are finished click Save.
To find the pattern you want to work with, on your image in the Layers Panel, choose the layer you want to work with to open the Layers Attributes panel. Click on the Print icon. Then select Patterns.

At the bottom, you can Filter your patterns to show only those you have Uploaded or by Colors. You can also sort by Collection. In this tab, your options to sort are Themes, Styles, Artists, and Cartridges.
To select the pattern, simply click on it. This will fill your image layer with the pattern you choose. I love to use the pattern fill option when I am creating stickers for my planners.

Note: Please be sure you are not violating any type of copyright regulations. In general, most images are okay to use for personal use. However, sometimes this is not the case. If you have a question about whether you are allowed to use an image, please contact the owner of the image. And if you are using the image for commercial use – in an Etsy shop, on your blog, a product you are selling, be sure you have the proper licensing to be able to do that.

Some of my favorite places to download and purchase images, SVGs, and patterns:
- Design Bundles
- The Hungry Jpeg
- Etsy
- Creative Market
Check back and subscribe to my channel for more Cricut Design Space Basics tutorials each week.
You may also like:
- How to Create Planner Stickers with Your Cricut
- Cricut Frequently Asked Questions
- Cricut Maker vs. Explore Air 2
how to upload images to cricut design space app
Source: https://www.laurascraftylife.com/how-to-upload-images-to-cricut-design-space/
Posted by: hydesith1974.blogspot.com
0 Response to "how to upload images to cricut design space app"
Post a Comment